'Snakes' knives

snake_2586

Well-Known Member
I know a few of you have had knives from me now, and as I was doing a bit more on the next batch I thought I would post a few 'in work' pics to show how they progress.

As the shape seems to be popular and I think I have it about right now I have made a template, it certainly makes it quicker to rough them out.
template.webp

Before I made the template and still for the other shapes I'm marking the shape and grinding to the line.

small.webp

I didn't take any pics of marking or cutting the larger blades but here they are after I have tidied them up.

heap.webp

Can you spot the one where I got distracted, and lifted the plasma cutter off and then restarted, in the wrong place?

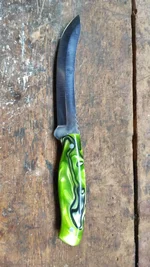
Not a good pic, but here's the blades all ground and ready for hardening.

ground stack.webp

The one with the hole was not a problem just a minor change in the shape of the blade.

correction.webp
 
Got this knife today, very pleased with it.
I had pictures and a running WhatsApp conversation throughout the knife-making period.
All I need is a kind fallow to allow me a field test.
The last image has the wax still on it, more to show the size. Good heft, lovely shape and very sharp. Beautiful sheath, proper craftsman job.


8F35E586-287C-4536-B294-554088C8E9BF.webpCA99F980-E725-4451-929E-CA64E2B5E17A.webp90E23519-E7B3-4F20-AB7A-9D94E31DF902.webp
 
A bit more progress on those sheaths.

My snake has been pressed into the rear of the sheaths and a roe head on the front of some of them, they have also been dyed and had the welts glued one one side.

1.webp

These I have now punched the stitching holes through the front of the sheath and the welt, I have also folded the belt loop, it is this stage that I would normally stitch it but on these (next batch for the EKA swingblade) I thought I would try something different and use a press stud/popper.


2.webp

These have been folded and glued, I have also pushed the stitching holes through the rear with an awl so everything lines up.

3.webp

This one has been stitched.

4.webp

These 2 have had the welt trimmed flush and the edge sanded, they now need the edge-corners beveling and the edge burnishing and then dying.

5.webp
 
Another update for those of you still watching.

The brown sheaths from above have now been folded, and there stitching holes have been pushed the rest of the way through the third layer of leather.

1.webp
2.webp

The black ones have had there edges finished and have been waxed.

4.webp
3.webp
 
A couple of the knives are coming together at the same time as the sheaths, so here's some more pics.

The handle scales have been pined together roughed out and had the blade end profiled, sanded and polished.

5.webp

I then mark out where the scales will sit on the blade and rough up all the surfaces to be glued.

6.webp

The next pic is one of the knives clamped up gluing.

7.webp
 
I have been asked for an unzipper, and as I don't have any of those blanks made and ready to go, here's a few pics of it as it progresses.

IMG_20201010_160444.webpIMG_20201010_170839.webpIMG_20201010_190212.webpIMG_20201013_190023.webp

Now it is awaiting hardening.
 
Got this knife today, very pleased with it.
I had pictures and a running WhatsApp conversation throughout the knife-making period.
All I need is a kind fallow to allow me a field test.
The last image has the wax still on it, more to show the size. Good heft, lovely shape and very sharp. Beautiful sheath, proper craftsman job.


View attachment 176933View attachment 176934View attachment 176935
Snake,

Can you make me one of these please mate , I'd like a glow in the dark green handle to match the other one you made me, with a plain sheath with no deters head on,

PM me with cost please

Kjf
 
Back
Top