Great work Tak, the bit that frightens me about making something like this is the bonding together of the two halves and filling the stock, how do you do that, cheers mate
Ian.
Hi Ian
I trim the excess carbon fibre neatly while it's still slightly flexible before it's completely cured. I apply plenty of thickened epoxy on and adjacent to the edges to be joined before bolting the mould halves together. The moulds have registers on them so they align perfectly. Then I apply 2 layers of wetted out 2" carbon fibre tape to all joins on the inside of the stock - easier said than done! The barrel channel/action area and also the butt end is open for this.
Doing this work while the carbon fibre is still partially cured/ green means that a very strong chemical bond is achieved.
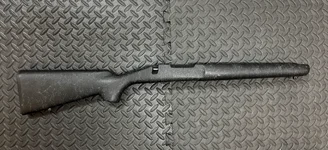
When the stock shell comes out of the mould it is trimmed with a die grinder and Dremel cutting disc then a small sanding wheel. The shell weighs roughly 300g at this point.
I then dam up the pistol grip just behind the action area with plasticine, then fill the butt with 2 part polyurethane foam that aids stiffness of the stock a bit and helps the stock to not sound hollow.
After this the plasticine is removed and the top and bottom RTV Silicone inletting moulds are put in the stock and secured tightly to it. The stock is upended and epoxy resin is poured to create the inletting. Small quantities are poured at a time with long waiting periods inbetween. Pour in 2 much at once and the exothermic heat from the epoxy gets too much and big cracks can form, and also distort the stock (been there, done that).
Then the separate barrel channel is glued in and the foreend filled with PU foam.
The swivel studs can be glued in now or right at the start depending on how one wants to do it.
The butt is then cut to suit required LOP, 2 holes drilled for buttpad screws and filled with epoxy and a few layers of carbon fibre laid up. Buttpad then installed with screws and or glued on. Then use sanding wheel on Dremel to grind buttpad to fit.
Plenty sanding steps etc inbetween all this.