ApexOrdnance
Well-Known Member
Hi all,
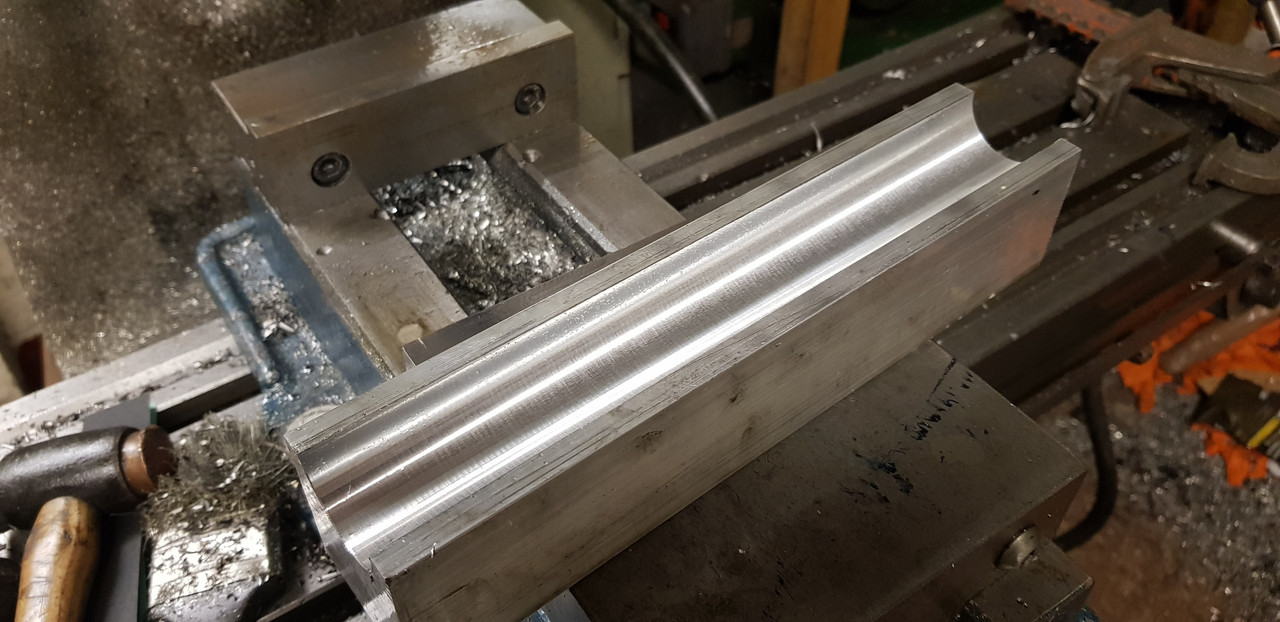
When the March lockdown hit and it became apparent that I was going to the range any time soon I did what most men do when faced with excess family time and hid in the workshop. A bit of background, I've been in engineering for the best part of 25yrs and prior to moving to the darkside of shirts and ties, spent the majority of those years as a machinist. This was in the days when we read dials and not g-code. I had an engineering business for a few years and kept the most of the machinery when I finished. I've never been a wood and blue person, more matt black and multicam. I had a Rem 700 in a composite stock that I was never 100% happy with. The stock flexed at the fore end and would touch the barrel under its own weight when shot from a bipod. I considered epoxy filling the stock to give it more strength but didn't fancy all the mess and refinishing involved. I also wanted a box mag conversion but was far to tight to invest in new bottom 'metal'. Since the Rem 700 inletting is relatively simple geometry I decided to machine a billet chassis and a box mag conversion whilst I was at it. I set out line boring some square billet to the action diameter.
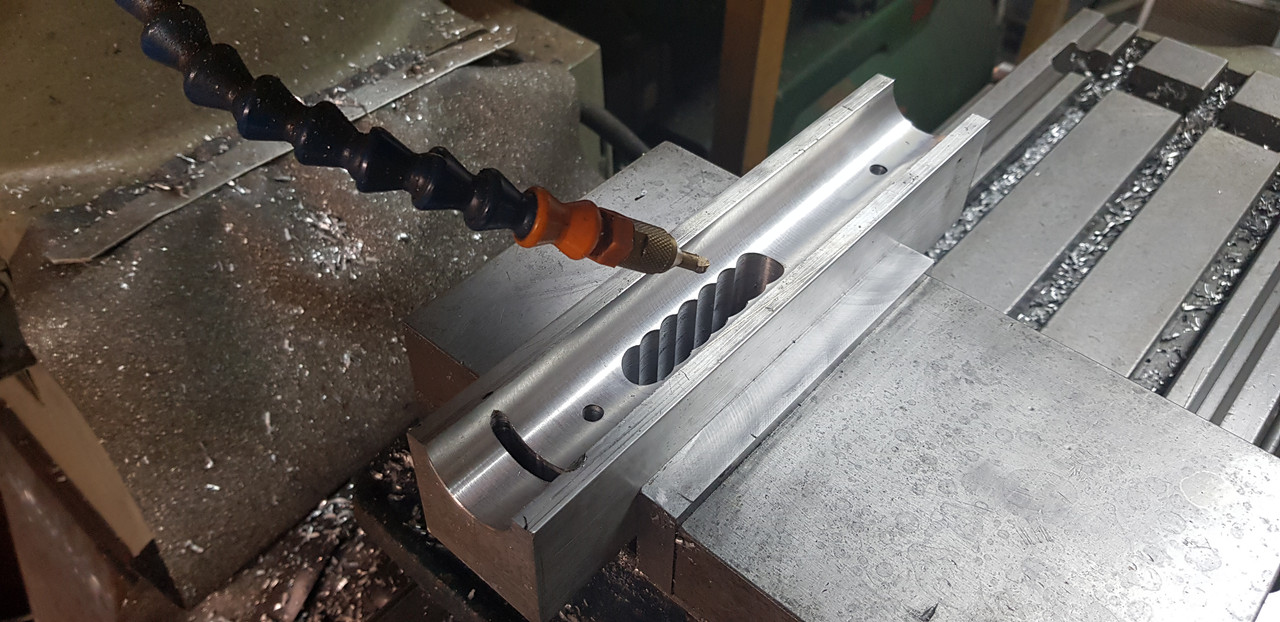
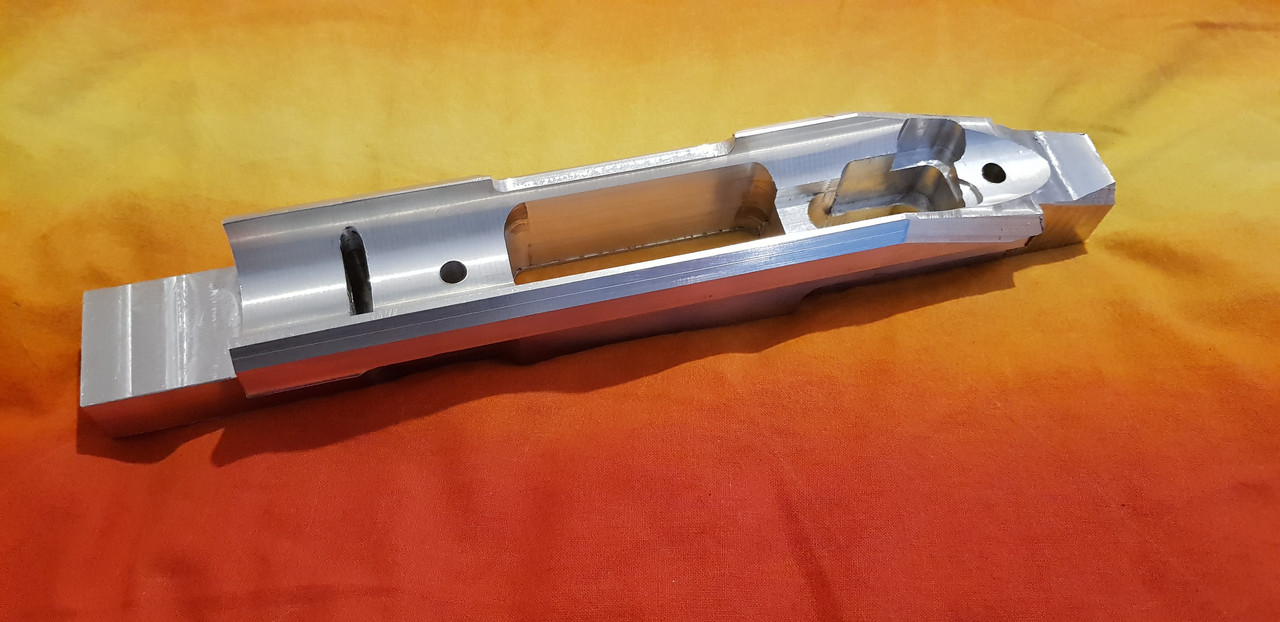
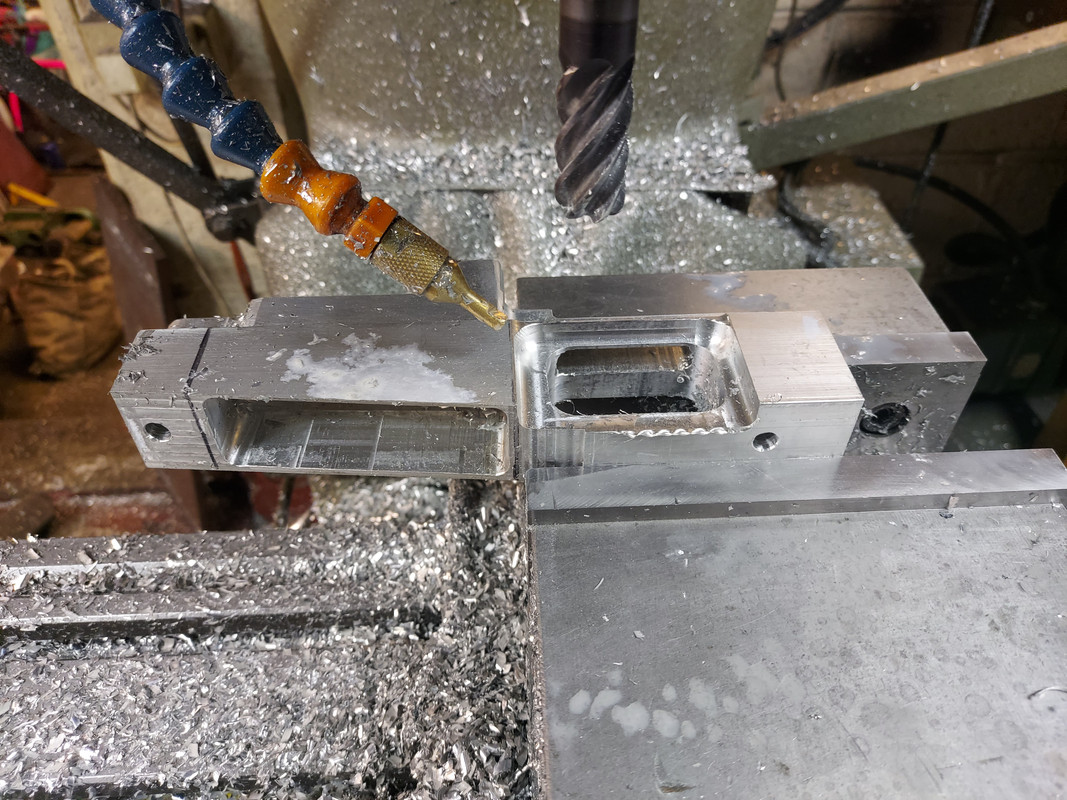
 Next, following a set of Rem700 action drawings I started inletting. First off was the recoil lug pocket and action screw holes. These are the most important datums. Everthing else can be located from the action screw holes.The hole for the mag conversion. I left plenty of clearance first time round with this as I was still unsure of how I was going to uild it.
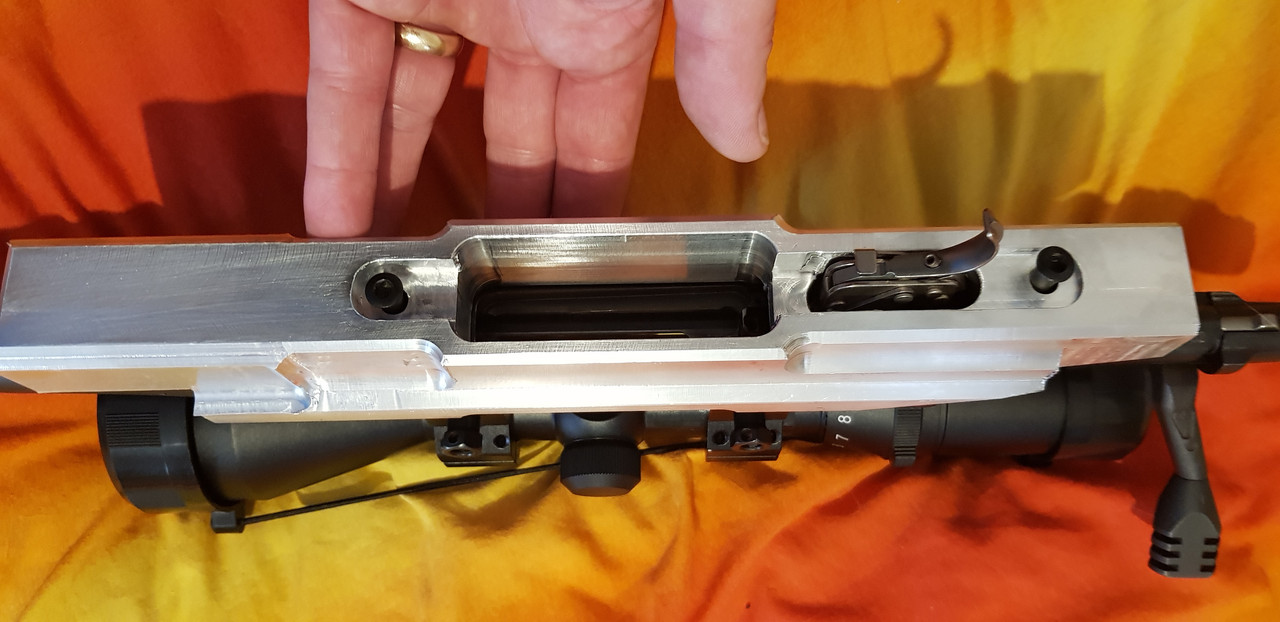
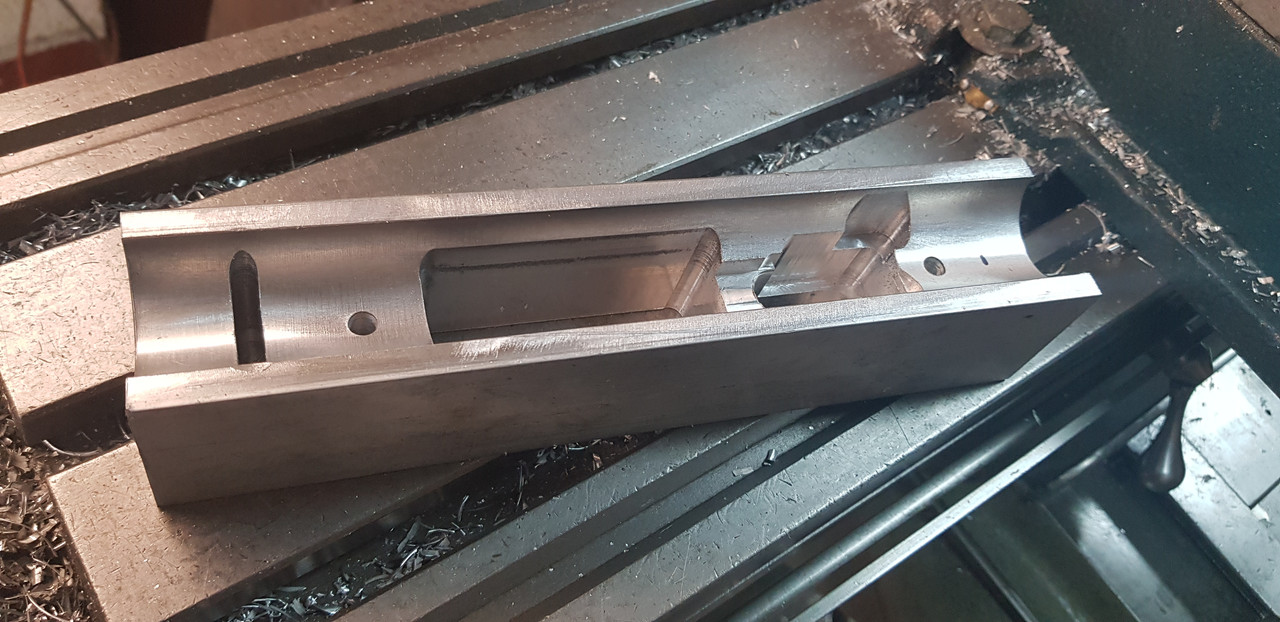 Once the main features are in the block is flipped to recess for the trigger guard and mag well.
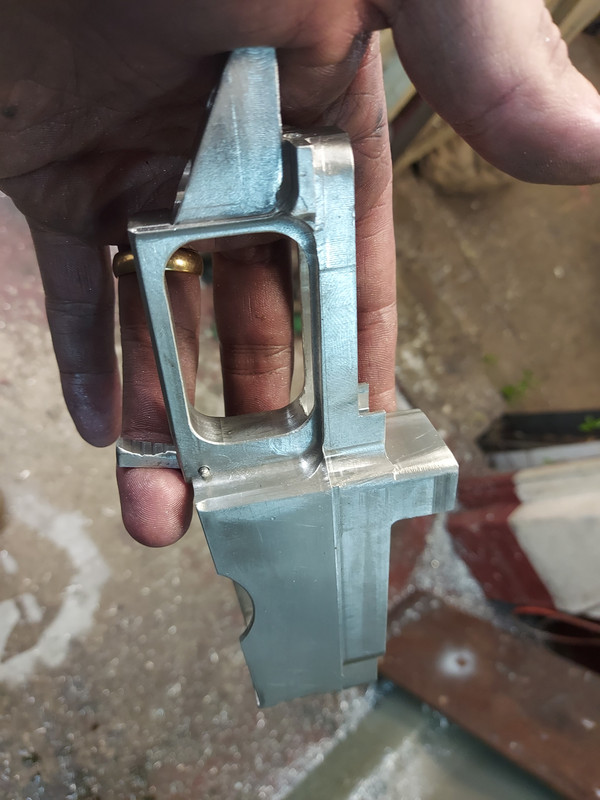
Next was the angled cut at the back to clear the safety and some relief on the sides to drop some weight and add some shape to it.
 I had to add a support at the front to mount a fore end. Not something I had initially considered.
 The fit was good, I marked the closed bolt position and moved on to the hand guard. Heavy walled tube was the solution.
 Next was the mag well and trigger guard. I borrowed a friends legacy plastic mag conversion to copy.
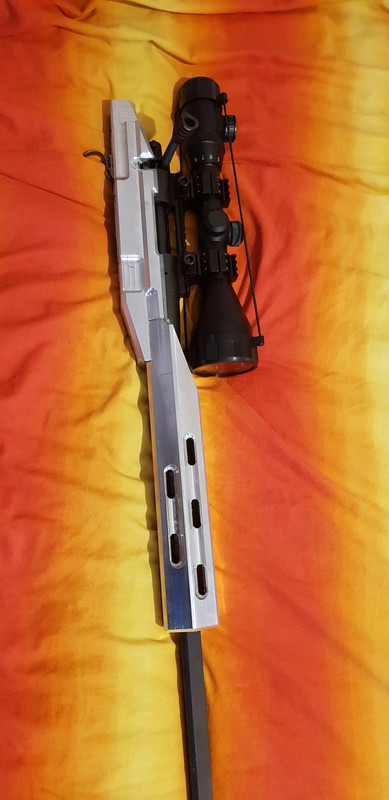
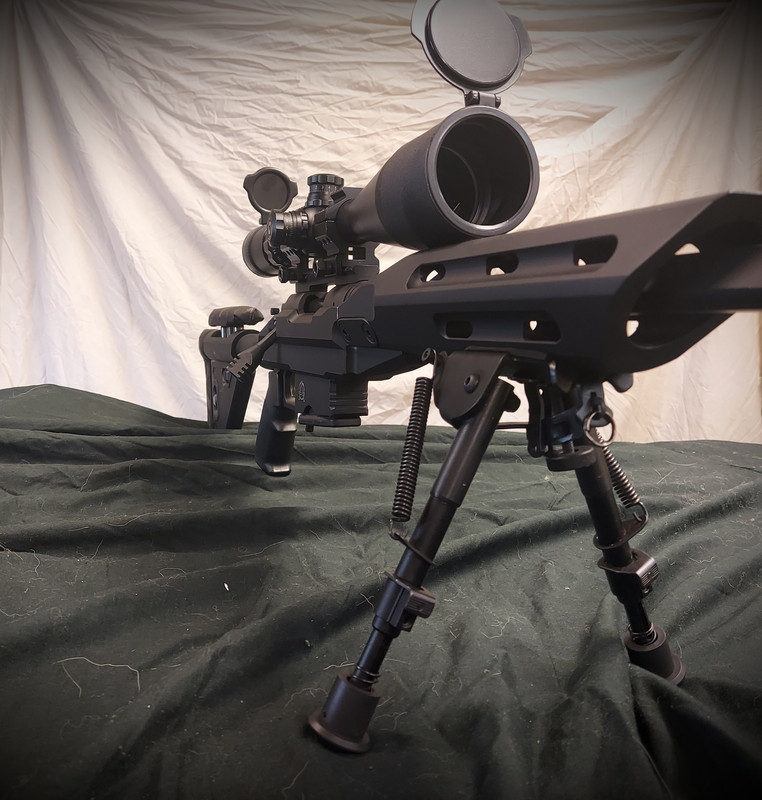
 I didn't get any photo's of building the adjustable cheek and butt pads but after some fettling and a good dose of krylon I had what I thought was a pretty nice rig.
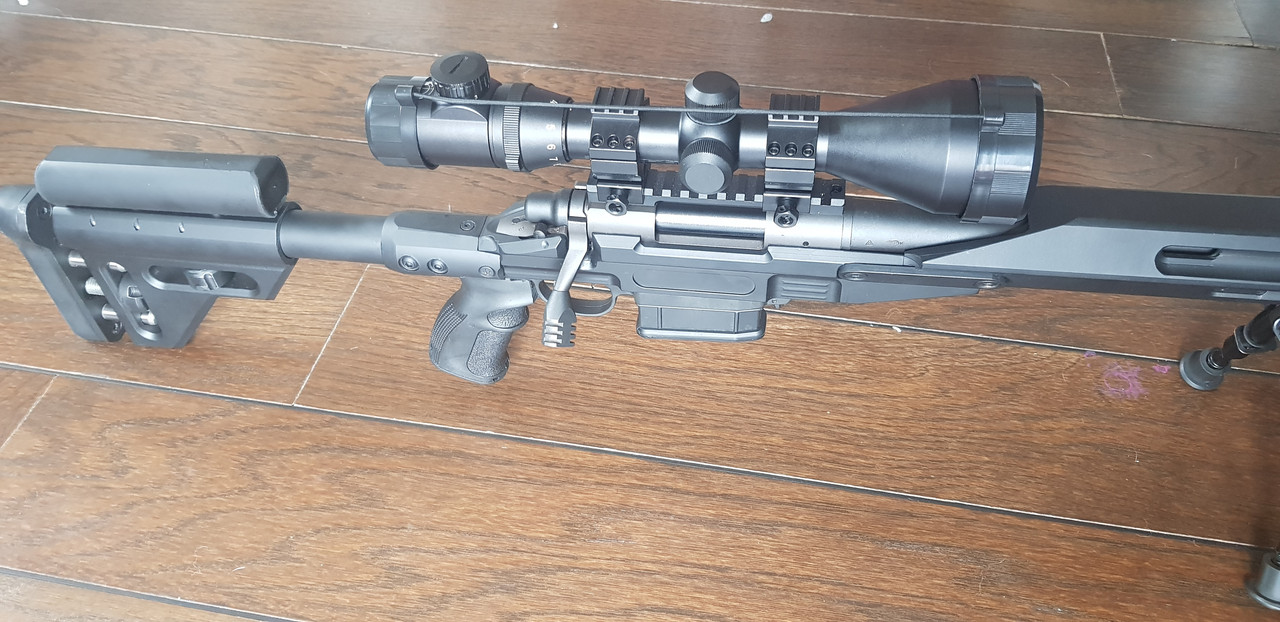
 This chassis was sold the day I returned to the club after putting about 40 rounds through it. I was happy with how it turned out but it wasn't perfect. There were too many fixings, I didn't like the tiny mag well or the front mag release. The next chassis was going to be better.
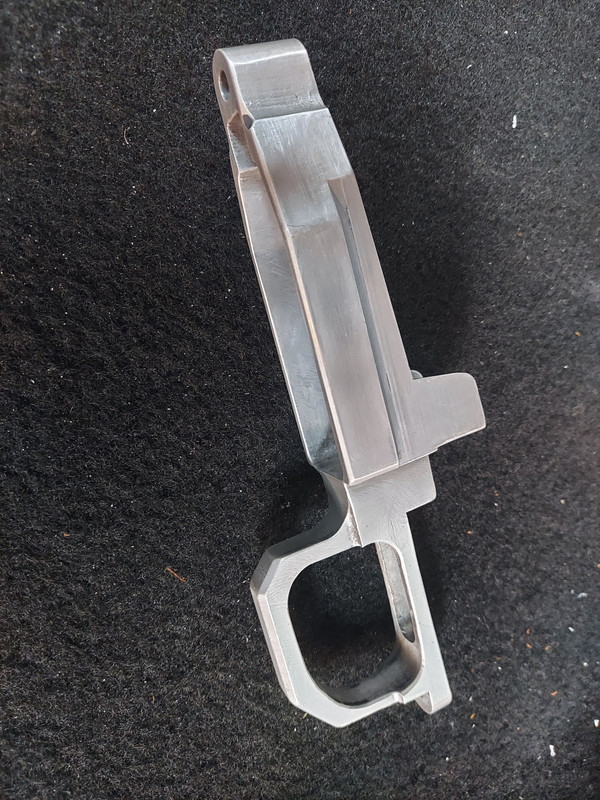
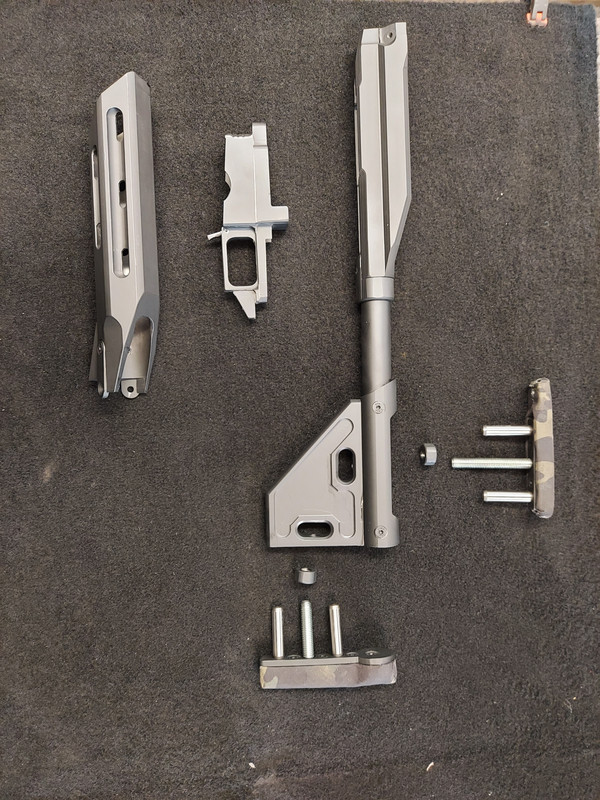
I decided that now I was comfortable with the relationship between the bolt and the magazine I could do my own thing. I opted for a much deeper mag well with a rear release catch, it allowed the magazine to sit flush and prevented accidental release if up againsr barricades.

 Second chassis in the bag, out with the krylon and ready for assembly.
 I managed to get 20 rounds through this before I once again sold it to another member.
I'm now well into the third chassis and have now perfected the magwells and have moved to side button release.
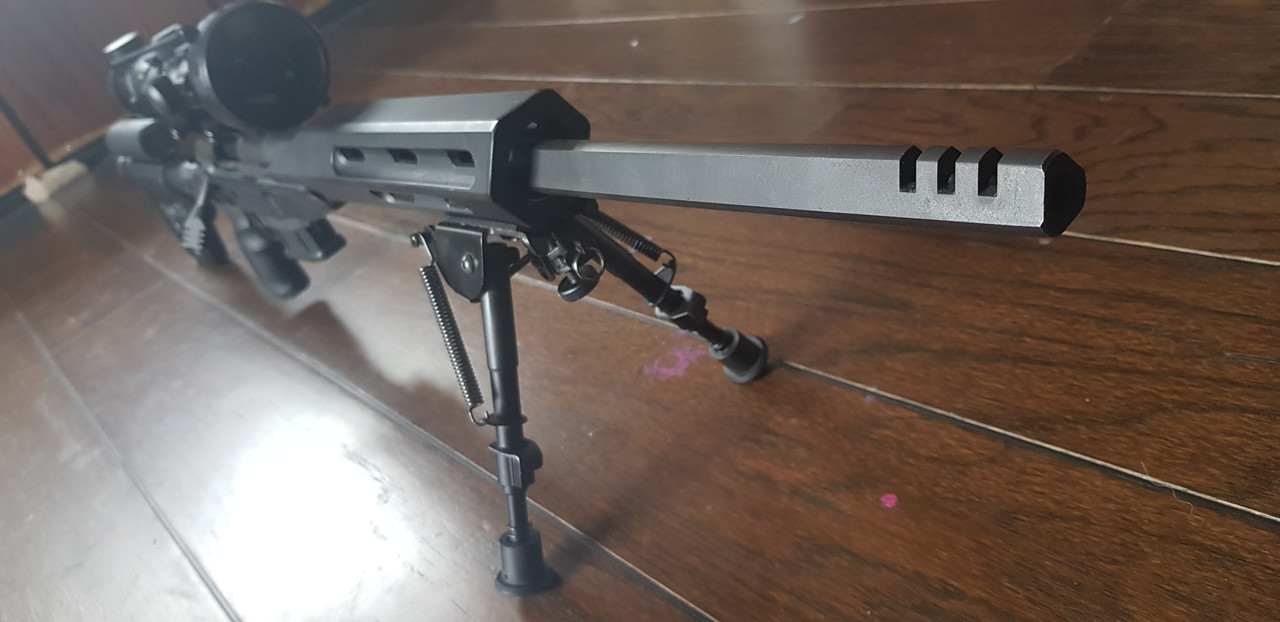
Muzzle brake was the next thing to come off the lathe.
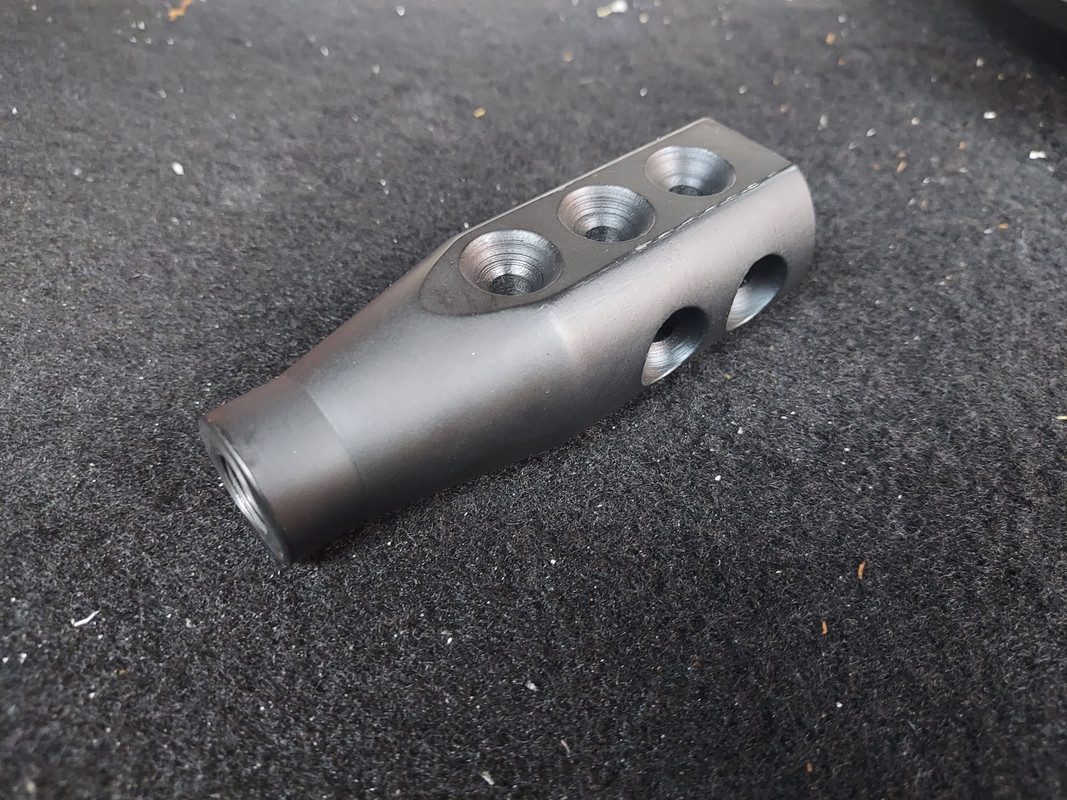 It didn't make me the most populat person on the firing point but certainly did the job.
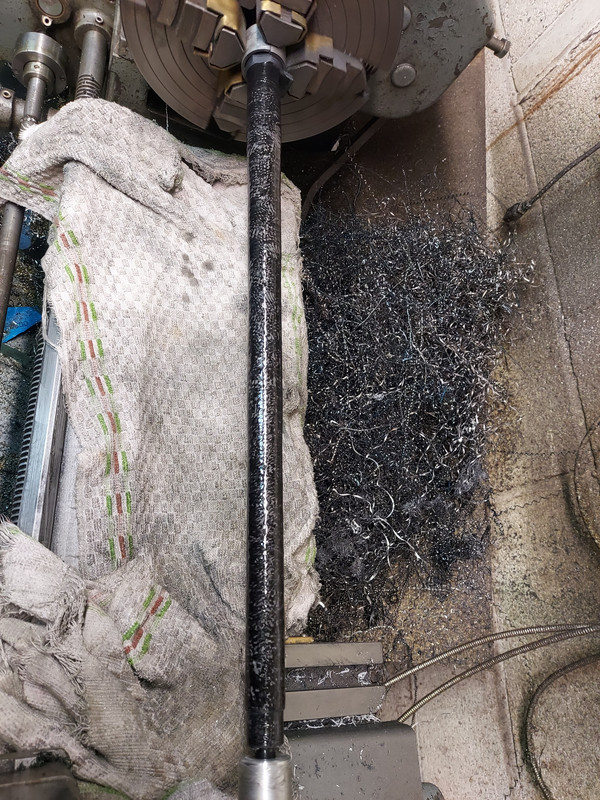
Next up is my A-Bolt. I've never liked the skinny stalker barrel so I decided to carbon wrap it. Took the diameter from 17mm to 24.5. I've re-machined a more manly contour, added a muzzel brake and am about to start on a mag conversion and chassis. Let me know if you find it interesting and I'll post the journey.
When the March lockdown hit and it became apparent that I was going to the range any time soon I did what most men do when faced with excess family time and hid in the workshop. A bit of background, I've been in engineering for the best part of 25yrs and prior to moving to the darkside of shirts and ties, spent the majority of those years as a machinist. This was in the days when we read dials and not g-code. I had an engineering business for a few years and kept the most of the machinery when I finished. I've never been a wood and blue person, more matt black and multicam. I had a Rem 700 in a composite stock that I was never 100% happy with. The stock flexed at the fore end and would touch the barrel under its own weight when shot from a bipod. I considered epoxy filling the stock to give it more strength but didn't fancy all the mess and refinishing involved. I also wanted a box mag conversion but was far to tight to invest in new bottom 'metal'. Since the Rem 700 inletting is relatively simple geometry I decided to machine a billet chassis and a box mag conversion whilst I was at it. I set out line boring some square billet to the action diameter.
Next was the angled cut at the back to clear the safety and some relief on the sides to drop some weight and add some shape to it.
I decided that now I was comfortable with the relationship between the bolt and the magazine I could do my own thing. I opted for a much deeper mag well with a rear release catch, it allowed the magazine to sit flush and prevented accidental release if up againsr barricades.
I'm now well into the third chassis and have now perfected the magwells and have moved to side button release.
Muzzle brake was the next thing to come off the lathe.
Next up is my A-Bolt. I've never liked the skinny stalker barrel so I decided to carbon wrap it. Took the diameter from 17mm to 24.5. I've re-machined a more manly contour, added a muzzel brake and am about to start on a mag conversion and chassis. Let me know if you find it interesting and I'll post the journey.

 as I really like the shape of it , also is there a point that if needed a bag rider or a mono pod / pic rail could be fitted . Also again is it the same OD as a M4 tube, But not the milspec type .