Calibrating propane forge using K-type thermocouples and optical thermometer

I suspect that his thermocouple junction was nestled in the forge lining, or at least did not protrude into the furnace very far. Thus he knew that what he had measured was the temp of that lining.
I am sure he did. But the match with the blade was still by eye.

But it is the hotspots of a light lined furnace which make for innacuracies. With my heavy walled furnaces the lining does eventually even out after a bit. The tile or ceramic fibre lined forges with atmospheric burners pointing at the floor rely much more on the flame for the heating directly.

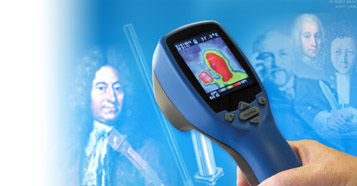
Getting an idea of the temperature range in different parts of the furnace is one of the reasons I fancied playing with an optical temp. gun. I could see which were the hottest areas but was interested to put relative figures to the colours.

I have relied on my eye and the experience gained from burning various metals accidentally to hit the right temperature for the operation...puddles of Silicon Bronze are expensive, so you learn tell tales fast. But the temperature intricacies of the lovely tool steels available now are not so tolerant as the Progen I ended up using for everything.

Alan
 
Last edited:
hotspots of a light lined furnace which make for innacuracies.

Today's forge time proved this absolutely. The temperature gradient away from the burner's epicenter on my light walled forge is rapid and self evident in the colour variation in the test pieces, even after significant soaking.

That said, I now have more confidence regarding the accuracy of the two K probes plus optical unit. The difference between the two Ks reflects their relative proximity to core. The optical agrees with the range seen between them IMG_6187.JPG

What now seems to be the case is that there exists a 70℃ ish gradient between side wall and burner epicenter. In today's test runs with scrap AEB-L offcuts, when the stainless K declares 1034℃ IMG_6188.JPG IMG_6185.JPG the optical reckons the workpiece sat near the core is running at 1055℃. 1053℃ is the sweet spot for AEB-L hardening and the subsequent Tsubosan file test agreed that the optical unit had rightly adjudicated that sweet spot IMG_6195.JPG


So the takeaways for me are that:

  • I can use the stainless K probe to accurately set the forge's burner flow rate.

  • Using the optical thermometer takes some precision, and there may be variations in reading depending on how perpendicular the test piece is to the laser.

  • Once a workpiece has been running at the desired temp [soaked] for a bit, I will work the piece in and out of the flame till I see an even colour before quenching.
 
Using the optical thermometer takes some precision, and there may be variations in reading depending on how perpendicular the test piece is to the laser.

I have been aware of parallax issues with the convergence of the laser and the sensor depending on the distance to the heat source. There is a little graphic illustrating it on the side of my gun.

But the actual reading is of the radiant heat so it should not matter what the angle of incidence is to the radiating metal surface I think...providing it can “see” it.


That all looks very positive. Good to have some results that you can understand and build on.

Alan
 
Last edited:
Good work.

Some study material from Omega. You may find that the last one gives some guidance:


And if wanting to really study metallurgy, or at least skim through, Cambridge University make their teaching materials available online.

E.g:


Good work.

Some study material from Omega. You may find that the last one gives some guidance:


Shiny reflective metal surfaces like polished Aluminium and Stainless steel can play havoc with IR guns at lower temperatures.

It is interesting in this context though that the emissivity evens out...by the time the stainless is approaching the 860˚C level scale has already formed...so it is around the standard black 0.95 level.

Alan

That's not how I interpreted it.

For example, in the alloy steels section (various types of stainless steel, admittedly not necessarily comparable with what Zambezi is using):

Type 303, Oxidized
600-2000 (316-1093)​
.74-.87​

Type 321 w/BK Oxide
200-800 (93-427)​
.66-.76​

Type 347, Oxidized
600-2000 (316-1093)​
.87-.91​

Type C1020, Oxidized
600-2000 (316-1093)​
.87-.91​

Then we have the plain steel section.

Steel, Unoxidized
212 (100)​
.08​

Steel Oxidized
77 (25)​
.80​

So there might be quite a lot of variability. I observe that Zambezi had his IR thermometer to 0.99. Which I suspect was not appropriate.

On another point, that Aussie chap diy-ing it in his garage displayed IMO extreme stupidity in what he was doing by running a rich mixture. All that exhaust pouring out will have had incredibly high levels of carbon monoxide in it, yet there he was standing over it and breathing it in and filling up his garage and maybe other parts of the house as well.

Anyone operating a propane forge must take precautions, including CO alarms. If it were me I'd even have one around my neck as well.
 
That's not how I interpreted it.

I wasn't interpreting anything, I was just spouting off from my previous experience of using the things.

Shiny materials while they are still shiny, it goes all over the place...when they form an oxide layer, not so much...

As far as I could see @zambezi had his still on the default 0.95

Alan
 
Last edited:
I wasn't interpreting anything, I was just spouting off from my previous experience of using the things.

Shiny materials while they are still shiny, it goes all over the place...when they form an oxide layer, not so much...

As far as I could see @zambezi had his still on the default 0.95

Alan

Yes, of course you are right. Blame my old eyes. Zoomed in it is now clear. 0.95.

Nevertheless, nothing in that data, with an oxidised surface, has an emissivity above 0.91. And the SS materials were quite variable. Plain oxidised steel is given as 0.8.

As always, there is no substitute for practical experience. I would be very interested to take a look at some photos of your installations and what comes out of them, please share.

From a backwards engineering perspective you could take a look at this, where stainless steel is described as a none-grey-body material. Your handheld affordable device will be using a PVDF sensor behind a Fresnel lens, no spectrum filtering, much the same as a burglar alarm or door opener. It is quite amazing how good they are.


To Zambezi, I would suggest, trust the thermocouple, and calibrate the thermal device to it somehow.

Never stop learning.
 
It is true that if the emissivity is set too high then the machine will underestimate the temperature of the workpiece which could cause you to overheat it.

When I acquired my machine I was initially going by the blurb in the user instructions..."oxidised surfaces have an emissivity of 0.95"

IMG_9006.jpeg
But although my book agreed with your source and said iron oxides are around 0.78- 0.82 I went with my empirical observations.

What I found with 316 Stainless Steel was that the temperature readings on the shiny pickled and peeled surface of round bars danced all over the place...but the passivated surface of square bars gave steady readings and were not far away from the temperature reading of the concrete floor they had been lying on overnight. In the furnace when they were getting up to forging temperature of 1200˚C they were reading much the same as the adjacent castable furnace lining.

It is interesting though that 316 Stainless Steel at 1150˚-1200˚C is so bright that you cannot see the surface / facets or centre punch marks etc. which you are readily able to with mild steel at similar temperatures. I have forged a fair bit of 50mm 316 square and round into long octagonal tapers for handrails and such, and for the first few blows until the temperature drops I have to rely on the orientation of the porter bar to present it to the hammer.

Another win for empiricism is that apparently Zambezi has successfully heat treated the off cuts to produce the required hardness, without overheating and oxidising the surface too much using the machine set at 0.95.

So any fault appears to have been within tolerance for his purposes.

As he refines the process he will have the opportunity to play with the emissivity setting to suit his material...as you say we never stop learning.

Alan
 
Last edited:
First run today did not deliver correct outcome. I.e. different to the test pieces of previous run.

Blade emerged softer than expected [50-55Hrc].

One feature of today's run was that optical spot readings varied quite widely whilst thermocouple remained steady. [Some parts of blade declared 1120℃, but turned out no different to those spot tested at 1050℃]

And yet all parts of blade appeared to have same luninosity as guaged by eye. And colour also matched forge walls.

I have a lot to learn...Try again
 
The varied readings sound like the spot size not being contained by the workpiece...what size spot does it read at the range you are using it? Mine is based on 50:1 i.e Ø1" at 50"

Due to the parallax issue I found a sweep system worked best on smaller items.

A useful FAQ by the makers of my pyrometer, CEM, which has some helpful calibration and usage suggestions.


But there is nothing to beat results derived from the process in your furnace with the actual materials.

Alan
 
This is addictive. It is like baking a cake out of steel, but way more rewarding than a temporary victual. I am getting there.

The basic set up is two thermocouples plus the optical meter working in tandem. Cheapo thermocouple tracks forge left wall, stainless tracks same offset left of vertical burner as workpiece sits right: IMG_6204.webp In this configuration, the lower reading on the meter [stainless probe] is closer to the workpiece's actual temp. Experimentally it is 20℃ lower. Using a sweep technique on the optical meter seems to verify status quo: IMG_6208.webp. Workpiece is close to desired soak temp when probe at 1030℃-ish. The additional feature I have added to today's mix is to reduce the oxygen in the forge and that is evident by the orange flame of unburnt gas exiting the mouth IMG_6205.webp. And the result is a much cleaner workpiece post quench which requires minimal refinishing. And the odd
carbon divots in previous attempts with AEB-L did not recur. I think this is a key step.

The workpiece took a small warp in the forge pre-quench. So I braced it differentially once cool enough to touch. Well, when I say cool enough to touch it had ceased to be incandescent. Note to self: black metal can still be north of 300℃. IMG_6211.webp
 
Today's joyous conclusion is that I have a hard [very nearly 65Hrc pre-tempering] and a pretty clean workpiece post quench. Key to that was a few things I did not get right in previous runs:

  • This time I edged up to the operating temp using both burners. Multiple benefits:
    • Whilst I am not using the rear of the forge to heat workpiece directly, heating that space creates a temp gradient buffer zone: breezes coming in garage which previously caused temp swings now damped by greater thermal mass
    • Bring forge to operating temp more slowly meant that fine tuning the burners as the desired setting approached was achievable in smaller, more controllable, increments
  • Sweeping measurement technique with optical thermometer gives more accurate results than static hold
  • Trusting stainless thermocouple reading - it is well located to commentate on temp of workpiece position with minor offset in reading factored in
  • Once all of the above aligns, slight re-positioning of workpiece until colour evens [esp on edge] ensures uniformity of outcome

IMG_6207.webp IMG_6212.webp
 
by the orange flame of unburnt gas exiting the mouth

Commonly known as Dragon's breath. You will lose the hair on your forearms and occasionally your forelock and eyebrows, if you haven't already done so!

And the result is a much cleaner workpiece post quench which requires minimal refinishing.

The advantage to me of the oxide layer building up on larger bar at higher temperature giving a more consistent reading of course is reduced for you by your wishing to have minimal oxide build up...

Note to self: black metal can still be north of 300℃.


The minor black metal burn is renowned for being much worse than the minor red metal one oddly enough...after much discussion at blacksmithing events the consensus was that the trouble with black metal is that you don't get the split second advance warning of the radiant heat to alert you before you take the firm grip! :) Red metal seems to blister on the surface but black metal burns seem to go deeper and take longer to heal.

My worst one was grabbing a bit of Ø40mm Silicon Bronze out of the band saw vice having cut off the forging and forgetting that I hadn't quenched it first...as it slid through my burnt hand I automatically gripped it tighter to prevent it falling...big blisters. I remember the project which was in 2001 so as I started full time blacksmithing in 1974 I really should have known better...I had done it enough times!

Alan
 
Last edited:
what size spot does it read at the range you are using it? Mine is based on 50:1 i.e Ø1" at 50"

Sorry missed this earlier. Same ratio on mine. I am pointing at the workpiece from 45cm max. [I am located in the eyebrow-and-forearm-beware zone]

The central laser dot is easily placed on the workpiece with accuracy. Since it does not spill over the spine of a 3.2mm workpiece, the dot must be approx 1.5mm wide. Unless the laser has been skewed, readings should be on the button.
 
I glued up the slabs overnight and am quite happy with the result so far.IMG_6213.webp

The minor curve introduced in the forge was not fully remedied in the subsequent differential press IMG_6214.webp IMG_6215.webp. Not the end of the world, but part of the learning curve: If the workpiece distorts in the forge, then I must get the still hot

blade into an appropriate press pronto. What that means is building a jig beforehand rather than faffing with loose bolts and an obstructionistic metal vice whilst the time window for remedy rapidly shuts.
 
Back
Top