Knife project #5: first attempt with RWL34 stainless

zambezi

Well-Known Member
I have made a handful of knives in high carbon steel and every one taught me a bit more in terms of method, finishes, hardening, optimum sequencing of tasks, etc.

High carbon steel is cheapish, makes an excellent blade but it takes some maintenance to keep blemish-free and sharp [at circa 55Hrc].

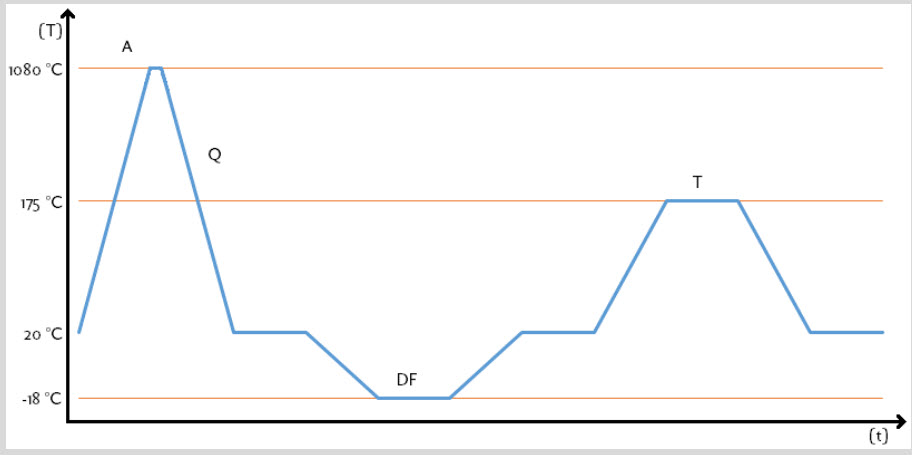
There are a myriad stainless steel options but all are expensive. And their hardening regimes are not as simple as for most high carbon steels. But I want a low-maintenance stainless hand-made knife so I took the plunge and bought some RWL34. If it all comes together, this will be hard to beat for durability and edge-retention.

Here we go...

IMG_5362.JPG IMG_5363.JPG IMG_5367.JPG IMG_5368.webp


Oh...and I treated myself to a bandsaw. It is a stellar performer on wood so rectilinear slabs that do not require too much hand truing should be a given [previously hacked slabs out with a jigsaw]. Plus less wasteful cuts on valuable stocks of ebony,genge, chestnut. The only fly in the ointment so far is that the blade [Starrets] that I bought to cut steel is rubbish. So I had to rough out this knife blank with the angle grinder again.

Any recomendations for a good metal cutting blade for a bandsaw? [2360mm/93"]

IMG_5364.webp
 
Last edited:
let me know how the heat treat goes please.


Will do. I plan to follow the Aussie chap's guide :

1601399432691.webp


1601399513326.webp


I have had good service from these guys.
Tell them what machine you have and stuff you need to cutt and they'll sort you out
 
Good progress today. But before I post pics of that, I want to share one of the things learnt during the previous knife builds. It might help others.

Plunge line protection.

On the knife-filing jig I built, I have added a file-stop so that the file cannot engage the metal beyong your chosen plunge line. What I had not factored in was that most of my files taper somewhat at the end furthest from the handle. It is a common feature.

What that means is that when you are filing the edge bevel close to the ricasso, you must reduce the file stroke length so that only the straight length of the file references the file stop.

If you draw the file too far back, the area where the file tapers engages the file stop and that allows the handle end of the file to bite further than you want. Your plunge line becomes a lazy lower case "L" rather than a straight line.

File stop limits file range, keeps plunge line straight IMG_5376.webp as long as straight edge in contact at all times. If file is drawn all the way back, the stop references the file's slopey shoulder, and the handle end jags towards the ricasso IMG_5377.webp. The effect is this : Example_of_file_stop_wander_on_plunge_line.webp
 
First I tidied up the blank roughed out by angle grinder yesterday using file IMG_5372.webp , Dremel IMG_5373.webp and wet-n-dry. I dusted off my knife-filing jig and clamped the blade in situ IMG_5375.webp Next I marked the midline of the edge and worked down to that line with barstard and then fine files IMG_5381.webp.

After lunch I will flip the piece in the jig and repeat the beveling on that side. Who knows, heat treat may even happen today :). But I won't rush as I am more keen on a good finish than a fast completion.
 
First I tidied up the blank roughed out by angle grinder yesterday using file View attachment 176144 , Dremel View attachment 176145 and wet-n-dry. I dusted off my knife-filing jig and clamped the blade in situ View attachment 176147 Next I marked the midline of the edge and worked down to that line with barstard and then fine files View attachment 176146.

After lunch I will flip the piece in the jig and repeat the beveling on that side. Who knows, heat treat may even happen today :). But I won't rush as I am more keen on a good finish than a fast completion.
So I've have found get hold of some old carbide drills and taken them to a green grindstone and giving them a flat spot along its length clamp these to next to the ricasso and the file can't add any extra unwanted scratch marks.
I think you can probably buy file guides that do something similar I just had short arms and deep pockets.
 
We have an amazing Bramley-hybrid apple tree that yields ridiculous weights of fruit every year. It has just decided to start dropping its best offerings, so my morning was devoted to pre-emptive picking and prep for the freezer. Knife work resumed p.m. ...


First up I gave the blank a 150 grit polish to remove all remaining tool scoring. Next I cut ebony slabs from my stock and using my new bandsaw was able to shape them fairly closely to final profile which was helpful because it revealed a hidden issue IMG_5397.JPG. [New RWL34 knife pictured at left, previous high carbon steel knife made using same template at right for reference] Once slabs were trimmed I discovered a punky section lying just above the area I require IMG_5399.JPG . As far as I can discern, it is a shallow blemish IMG_5400.JPG which does not pass all the way througn the slab. I will sand it back a bit to confirm timber is sound where it has to be before committing to use it. Last job today: drilling the tang and countersinking holes. IMG_5402.JPG Note leather glove to hold workpiece in case bit bites and blade rotates violently. Drilling through the tang is less for weight reduction [2.6mm RWL34 is lightweight] but more about allowing epoxy to have largest possible purchase on steel and through tang to marry both slabs. As before, this is a pinless design. I believe that is neater on a slender handle, plus the previous builds shows strategy is strong enough. I am busy this weekend, but blade is now ready for heat treat on Monday IMG_5404.JPG
 
The best bandsaw blades I've come across for metal are bi-metal blades. We buy them from Bedford Saw and Tool for work, and I have them for my saw at home too. Most proper metal blades will cut annealed tool steel OK, but these last far longer with a decent cut than any others we have tried. BS&T will make them up to spec for you if you know what length you need, they know their stuff.
 
Heat-treat day has arrived.

I set the forge up with the thermocouple probe passing through a hole in a brick such that it would sit very close to the blade in the forge IMG_5407.webp IMG_5413.webp. It took a long time for the diminutive forge to reach my revised target temp of 1050ْ C and it looked to be under some stress IMG_5417.webp. In my head I could hear Scotty admonishing Kirk that the vessel's limits were about to be exceeded. I left the knife in for 7.5 mins and quenched in the rye oil IMG_5419.webp followed by a vertical plunge into a bucket of water to ensure steel at room temp inside 120 secs from emerging from forge. After that, I popped it in the freezer at -18ْ C for 90 mins. The final phase will be a couple of hours at 175ْ C per my revised schedule which seeks to secure a 62Hrc finish Heat_treat_for_62hrc.webp
 
Question, and please bear in mind my bladesmithing knowledge consists solely of what I’ve gleaned from watching forged in fire, but does that pair of holes not create excessive weakness at a fairly critical place on the blade/handle junction?
 

Attachments

  • 0655F0CF-1BB0-44BB-8493-ABDF7EEA4F8A.webp
    0655F0CF-1BB0-44BB-8493-ABDF7EEA4F8A.webp
    77.6 KB · Views: 14
Question, and please bear in mind my bladesmithing knowledge consists solely of what I’ve gleaned from watching forged in fire, but does that pair of holes not create excessive weakness at a fairly critical place on the blade/handle junction?

Fair question.

If this was a scandi grind bushcrafting blade, I would agree with you. I.e. if I was ever going to baton or lever this blade, that level of material removal at that point would probably be unwise.

This is a 2.6mm gralloch knife that I intend to sharpen to scalpel sharp. As such, I doubt very much force will ever be transferred through that point.

Furthermore, I have usually found that assembled objects become much stronger when laminated. So if the strength of the metal was considered in isolation, or that of either slab, they would be significantly weaker than the three bonded together. In this dynamic, I reasoned that the greatest epoxy-to-steel-to-slab surface area at this point would grant the most significant laminate marriage.

Time will tell...
 
I decided to clean up the slabs whilst the blade ran through its tempering cycle. The first part was to use the linisher to see how deep the punky wood runs in the slab IMG_5422.webp. It was shallow. The Sabah ebony is lustrous IMG_5424.webp. Next I placed a sheet of 100 grit sandpaper on a piece of glass and started to true up the slab faces that will be offered up to the tang IMG_5425.webp. The grain looks wonderfully rich. IMG_5427.webp
 
After the heat treat, there is always clag on the steel IMG_5431.webp which has to be removed starting with 150 grit IMG_5432.webp and then moving up the grits IMG_5433.webp until you have the finish you want. I did the last pass with 600 grit. The next thing to do is to profile the slab ends nearest the ricasso as they are the hardest to work on once glued up. I sketched a curve IMG_5434.webp and then clamped slabs together before using the linisher to apply the profile IMG_5435.webp. After that...
 
...it was time to apply a key to the tang faces for the epoxy to grip IMG_5436.webp , mix the epoxy, apply liberally and clamp IMG_5438.webp. What I now realise I forgot to do was test the hardness of the heat treat before glueing the slabs. Urgh. Skating calibration files over the 600 grit polished blade faces is not an option! What I might do is a edge of tang test. Tomorrow will be the sculpting on the handle's "coke bottle" profile and Lansky edge sharpening. :)
 
  • Like
Reactions: DRN
Like a kid at Christmas I sprung out of bed as soon as my eyes opened to retrieve the knife from the clamps and inspect the epoxy cure.

Frankly, a little dismayed. It looks ok overall [RWL34 project to left of high carbon prototype I made a month ago] IMG_5439.webp. I had run out of the Gorilla epoxy I used on all previous knives, so bought some Araldite instead. On paper it is the same thing. In practice it is not: Where the Gorilla epoxy dried to a translucent finish IMG_5442.webp, the Araldite has dried to a milky white. That is still fine as you won't really see it. However, where the Gorilla dried to a glass-hard finish overnight, the Araldite can still be marked with my fingernail IMG_5440.webp which is ominous. That may mean that the Araldite will accommodate some movement and hence this is a virtue, but I doubt it. None of the Gorilla-made knives have any issues and that is a better finish.
 
Back
Top